
Greetings, Office Insiders! My name is John Teichman and I’m a Program Manager on the PowerPoint team. I’m excited to share with you that we are turning on Modern Comments by default to help you collaborate more effectively. We would love for you to try out a couple of scenarios and give us feedback.
Do more with modern comments
We started our Modern Comments journey a couple years ago to introduce collaboration features to PowerPoint that take advantage of the cloud-based, connected world we live and work in. For a quick review of that feature set, check out this post.
Today, we’d like your feedback on two ways you can create and use comments: text anchors and comment bubbles.
How it works
Text anchors
Text anchors enable you to attach your comments to a specified range of text, instead of to an object, like an image, an embedded graphic, or an entire slide.
- Select the text you want to anchor the comment to, and then click Review > New Comment, or click New in the Comments pane.
- To create the comment, press ctrl+enter in PowerPoint for Windows or cmd +enter in PowerPoint for Mac, or click the Post button
 .
.

After creating and anchoring the comment, you can edit the highlighted text. Any text you add within the highlighted range will expand the highlighted area. Likewise, removing text will cause the highlighted area to contract. Adding text at the beginning or end of a range of highlighted text will not expand the highlighted area. If the entire highlighted text is deleted, the comment will attach to the object the text was in.
Comment bubbles
You can still anchor to objects by highlighting the item and creating a comment. The comment bubble will stay in the correct position and move with the object.
- Select the object you want to comment and click the New Comment button in the floating toolbar that appears.
- To create the comment, add the text you want, and then press ctrl+enter in PowerPoint for Windows or cmd +enter in PowerPoint for Mac, or click the Post button .
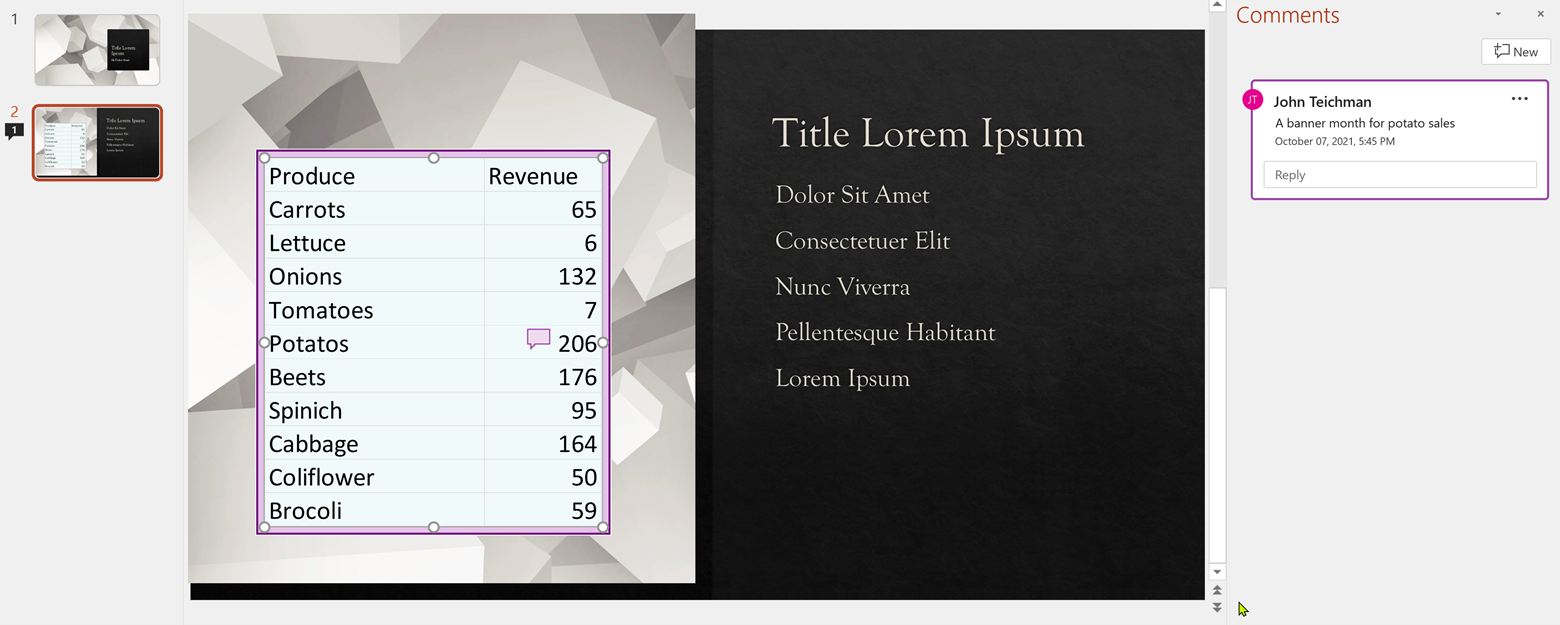
By default, the comment bubble appears in the upper right corner of the object. However, you can easily drag it to the exact location you want.
Scenarios to try
- Text anchors: Select a text area and create a comment. After the comment is submitted, try changing the text (as though you were editing the text based on the feedback in the comment). Notice that the text is highlighted when the comment is selected and that you can modify the text within the highlighted selection.
- Comment bubbles: Create a comment that is anchored to an object, move the comment bubble to the another area, and then move the entire object. Notice that the bubble stays in the correct position on the object.
Known issues and limitations
- Modern comments require a new file format, and therefore are not backward compatible with prior versions of PowerPoint. Customers trying to open a presentation that contains modern comments in older versions of PowerPoint will be prompted to open the presentation in PowerPoint for the web or to move to a supported version of PowerPoint (as listed in the Availability section below).
- Modern comments can be added to new files and or existing files which already contain modern comments. You can’t have both legacy and modern comments in the same file.
- Insiders using Consumer SKUs won’t have access to @mention feature.
Availability
This feature is available to Office Insiders running:
- Windows: Version 2108 (Build 14326.20004)
- Mac: Version 16.52 (Build 21080101)
Features are released over some time to ensure things are working smoothly. We highlight features that you may not have because they’re slowly releasing to larger numbers of Insiders. Sometimes we remove elements to further improve them based on your feedback. Though this is rare, we also reserve the option to pull a feature entirely out of the product, even if you, as an Insider, have had the opportunity to try it.
Feedback
We want to hear from you! Please select Help > Feedback in Windows to tell us what you think. On Mac, use the Send a Smile/Frown option (Send us a Smile 😊 or Send us a Frown 🙁 button at the upper right). Thanks!
Learn what other information you should include in your feedback to ensure it’s actionable and reaches the right people. We’re excited to hear from you!
Sign up for the Office Insider newsletter and get the latest information about Insider features in your inbox once a month!