Greetings, Insiders! My name is Kushal Kapoor and I’m a Program Manager on the Office Graphics team. Today, I am excited to announce a new feature in PowerPoint for Windows which helps creators simply and easily lock objects.
Lock Objects
Have you modified objects without meaning to while working on a presentation? By locking objects such as shapes, icons, pictures, 3D models, connectors, ink, you can now ensure that there won’t be any mishaps. In order to modify an object, you will have to unlock it first.
How it works
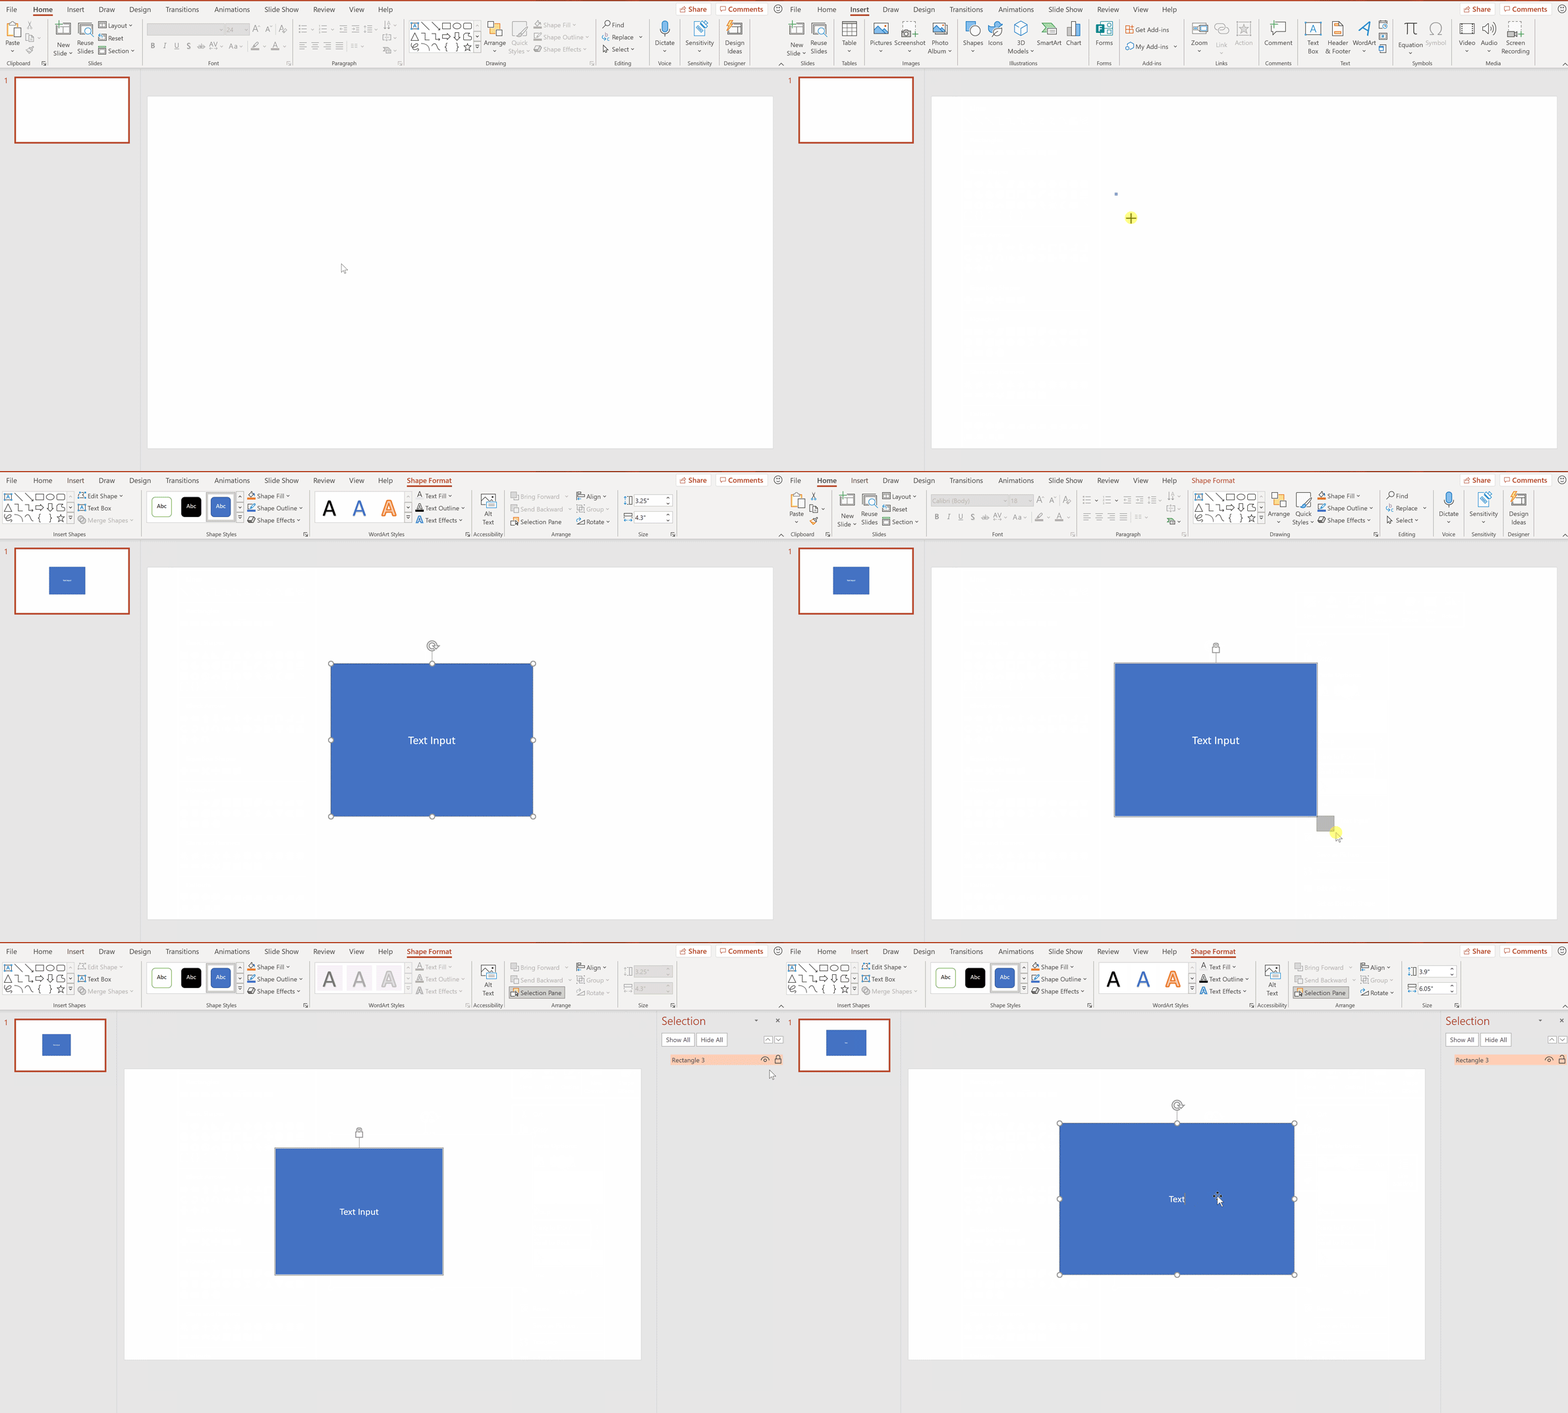
- Open PowerPoint for Windows.
- To create a presentation, by click New> New blank presentation on the File menu.
- To insert an object, click Insert > Shapes and select the shape you want.
- To lock the shape you just inserted, right- click it and then click Lock on the shortcut menu, or click the Selection Pane button on the Shape Format menu, and then click the Lock icon to the right of the object name.
- To unlock, click the Unlock icon to the right of the object name in the Selection pane.

NOTE:
Any locked objects saved in versions that support the feature will persist in legacy versions of Office that support those locks.
Availability
This feature is rolling out over the next several days to Insiders running Current Channel (Preview) Version 2104 (Build 13905.10000) and later.
Features are released over some time to ensure that things are working smoothly. Therefore, we highlight features that you may not have because they’re slowly releasing to larger numbers of customers. Additionally, sometimes we remove elements to further improve them based on your feedback. Though this is rare, we also reserve the option to pull a feature entirely out of the product, even if you, as First Release users, have had the opportunity to try them.
Feedback
We’d love your feedback, so please let us know how you think. To get in touch, do either of the following:
- Inside the app, select the Help button in the top-right corner of the app.
- Respond to this post or tweet at @OfficeInsider.
Learn what other information you should include in your feedback to ensure it’s actionable and reaches the right people. We’re excited to hear from you!
Sign up for the Office Insider newsletter and get the latest information about Insider features in your inbox once a month!
