
Hi everyone! I’m Sharon Grimshaw, a Program Manager on the Excel team. I’m excited to share that the Navigation pane you’ve grown to love and rely on in Excel for Windows is now coming to Mac!
Navigation pane
The Navigation pane helps you quickly get an idea of the layout of your workbook and the objects within it, jump to a particular part of your workbook, and organize your workbook using follow-on actions. You can also easily rename a sheet, scan the data you’ve gathered so far, or hide a chart, all from one place.
For more details about the inspiration behind the Navigation pane feature, including the role that user feedback has played, see my Tech Community post.
How to use it
- To open the Navigation pane, select View > Show.

- In the Navigation pane, click the arrow to the left of the sheet you want to review to display its contents, such as tables, named ranges, and images.
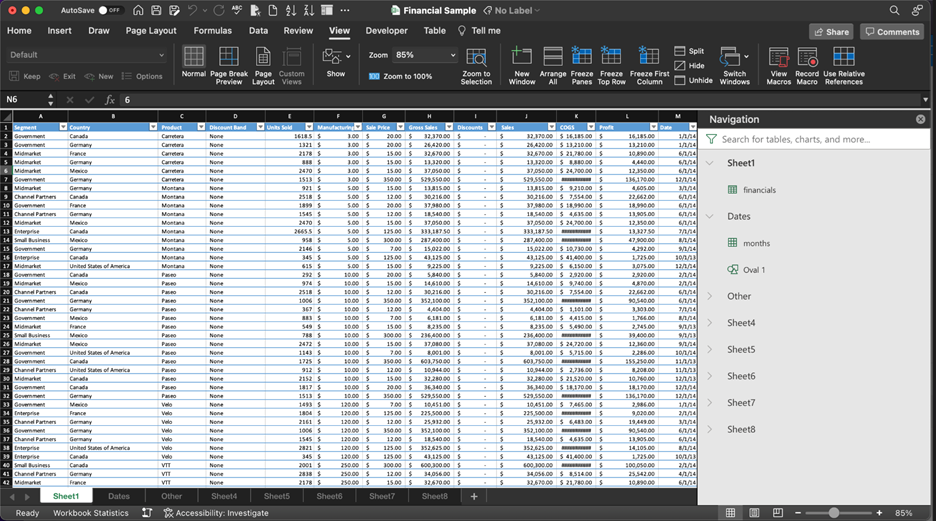
NOTE: Some elements can be modified directly from the Navigation pane by right-clicking the item and selecting from the available actions in the shortcut menu.
Availability
The Navigation pane is available to Office Insiders running Version 16.56 (Build 21120200) or later.
Don’t have it yet? It’s probably us, not you.
Features are released over some time to ensure things are working smoothly. We highlight features that you may not have because they’re slowly releasing to larger numbers of Insiders. Sometimes we remove elements to further improve them based on your feedback. Though this is rare, we also reserve the option to pull a feature entirely out of the product, even if you, as an Insider, have had the opportunity to try it.
Feedback
If you have any comments or questions, please let us know by clicking Help > Feedback. We’d love to hear from you!
Learn what other information you should include in your feedback to ensure it’s actionable and reaches the right people. We’re excited to hear from you!
Sign up for the Office Insider newsletter and get the latest information about Insider features in your inbox once a month!