
Hi, Office Insiders! We are Hitesh Manwar and Mouli Gopalakrishnan from the Outlook team. We’re excited to share that adding S/MIME encryption to your emails in Outlook for Windows just got easier! Admins can now add configuration options organization-wide with labels that populate to the Sensitivity drop down menu.
S/MIME options in Outlook
Many of you send digitally signed and encrypted messages using S/MIME (Secure/Multipurpose Internet Mail Extensions) to add an extra layer of security and protect message content by verifying the sender’s identity.
Previously, you could set up a custom configuration to enable S/MIME instead of RMS (Rights Management services) to encrypt or sign the emails using Azure Information Protection (AIP) client in Outlook. Users would then go to the Options tab to apply the S/MIME in Outlook.
Now we’ve made this important feature even easier to use by giving admins the ability to add S/MIME options to the Sensitivity drop down menu—no custom configuration needed! These labels allow users in their organization to easily encrypt and sign their emails with a single click.
How it works
For admins:
- Make sure that your organization has a working S/MIME setup.
- Click the Start button in the Windows taskbar, type PowerShell in the Search box, and then click Windows PowerShell.
- Connect to the Security and Compliance PowerShell by importing the Exchange Online Management module and connecting to the admin account.
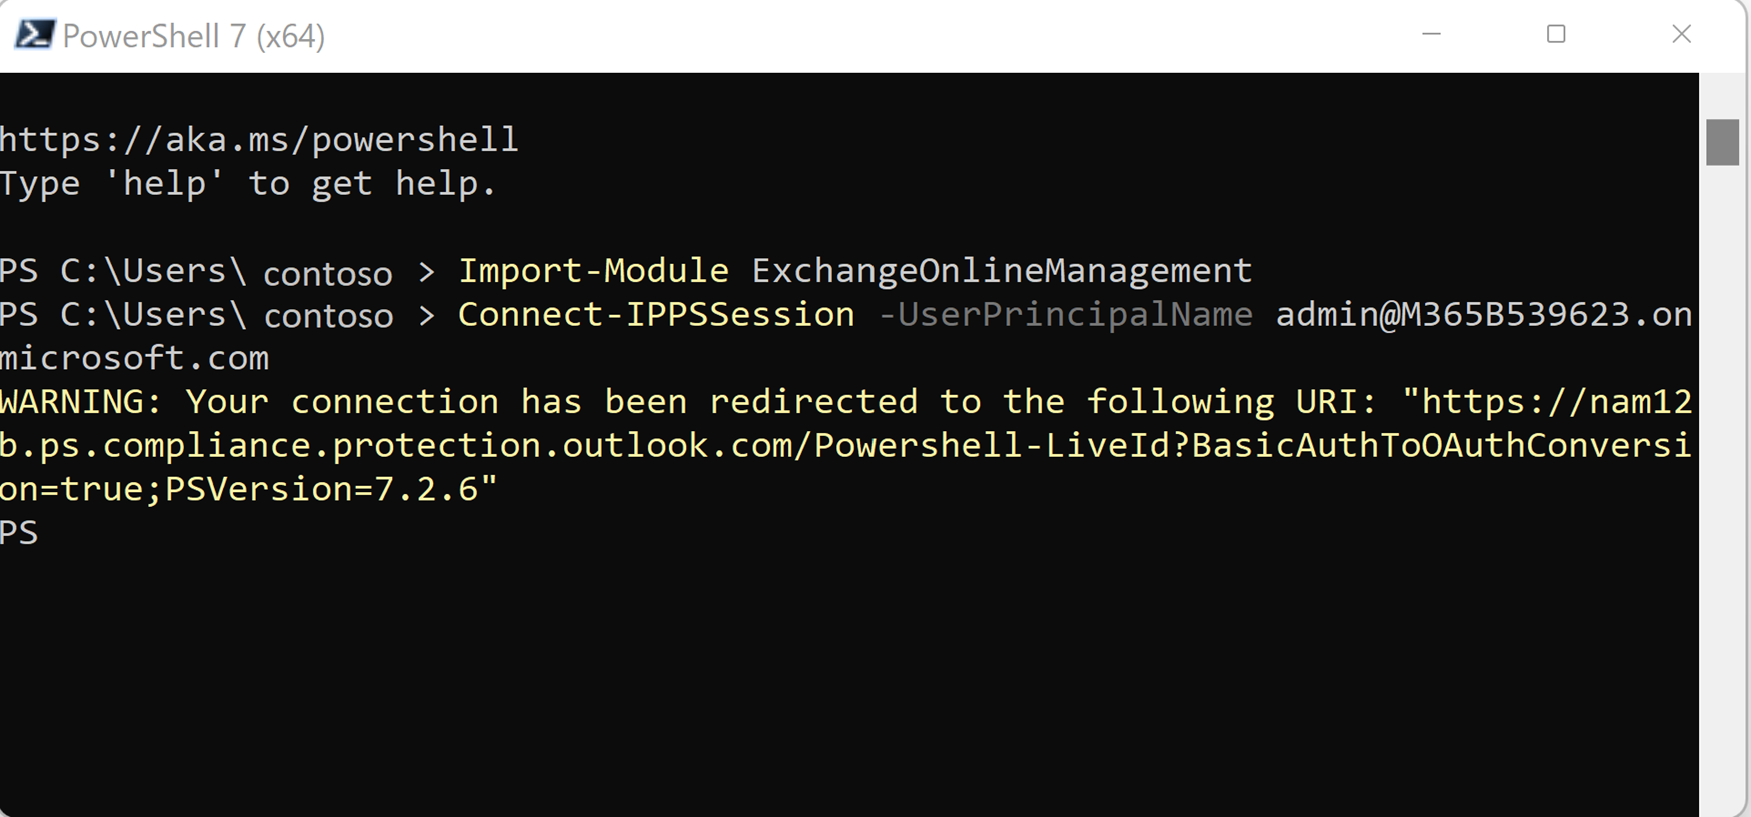
- Once the connection is established, you can use the Set-label or New-label command within the advanced settings of the PowerShell to configure an existing label to apply S/MIME encryption and signing.
- Example PowerShell commands where the sensitivity label GUID is ada3ca38-b2c0-468d-ac5f-656a4e0c4208 and the label is associated with both encrypt and sign:
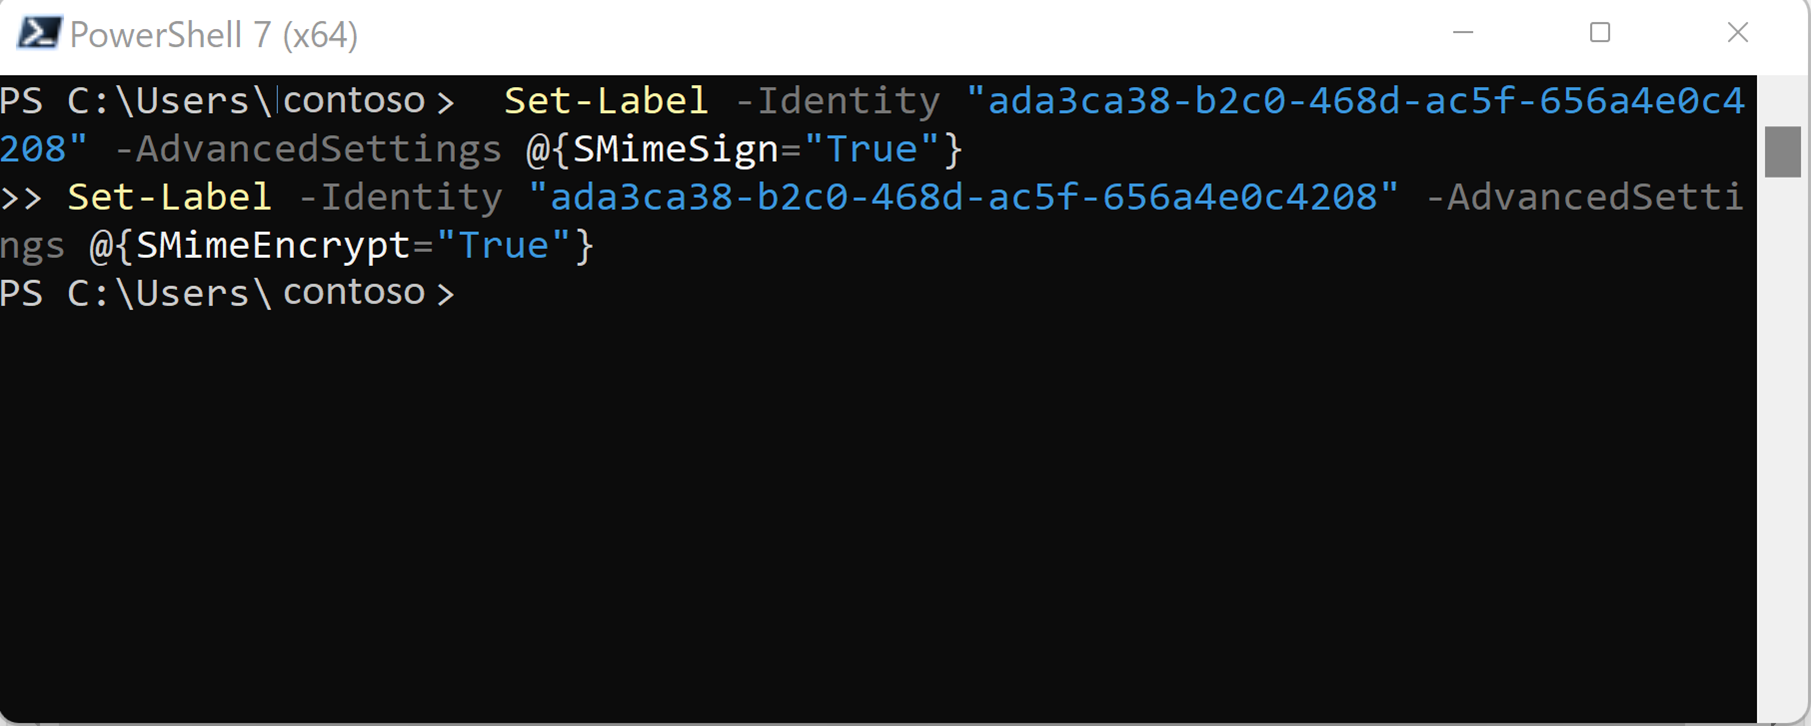 Once the set-up is done, users within your organization will start seeing the label with GUID “ada3ca38-b2c0-468d-ac5f-656a4e0c4208” appear underneath the Sensitivity tab. Make sure to rename these labels with an easily identifiable name to avoid user confusion.
For users:
Here are the steps to apply these S/MIME labels to your emails:
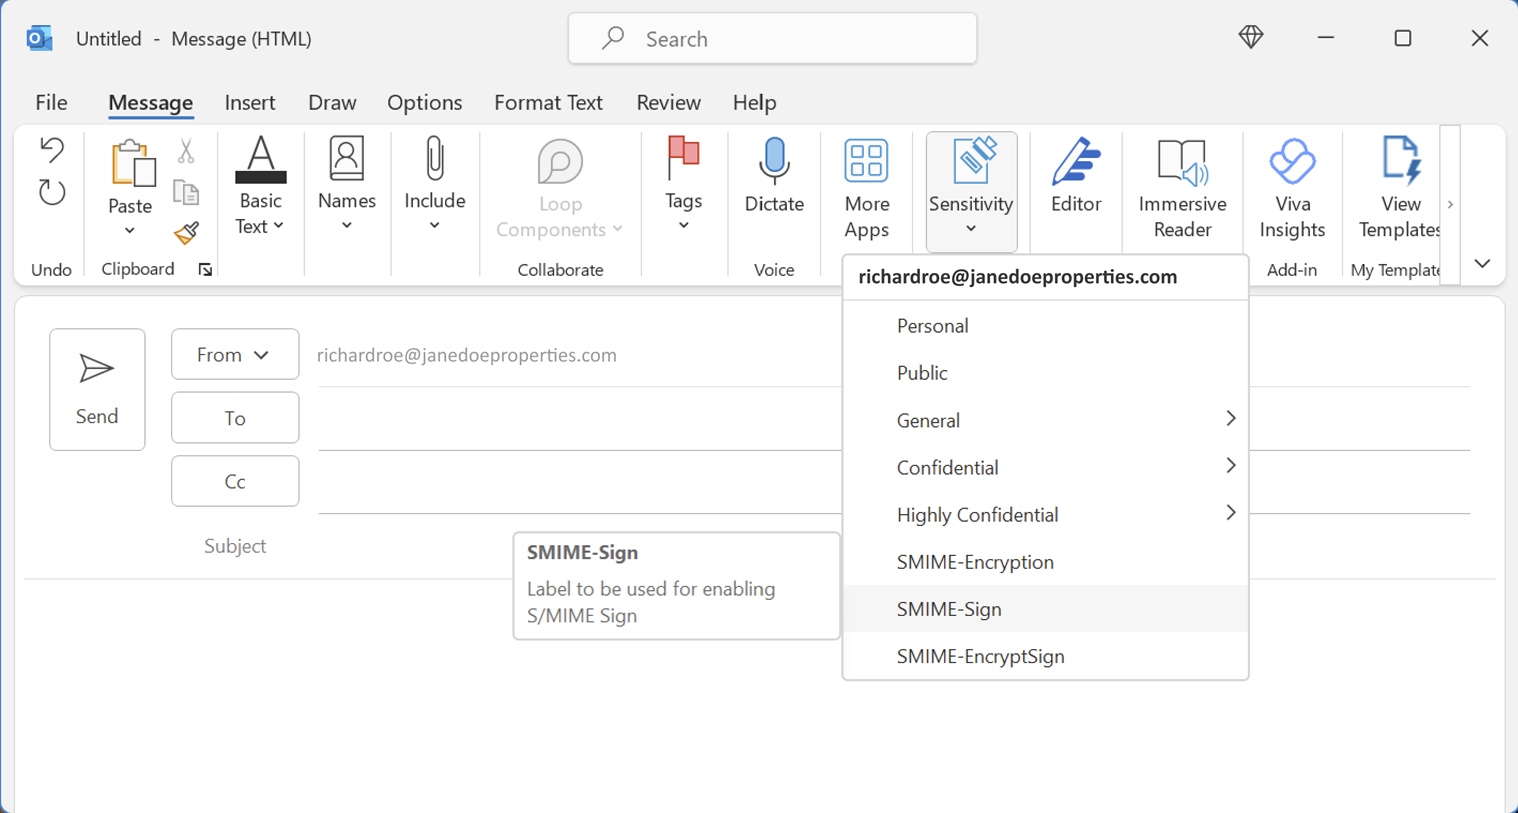
- Once your admin has set up these new labels, open an email in Outlook.
- Navigate to the Message tab and click the Sensitivity button.
- The new S/MIME encrypt and sign options will appear on the drop-down menu with the other sensitivity labels.
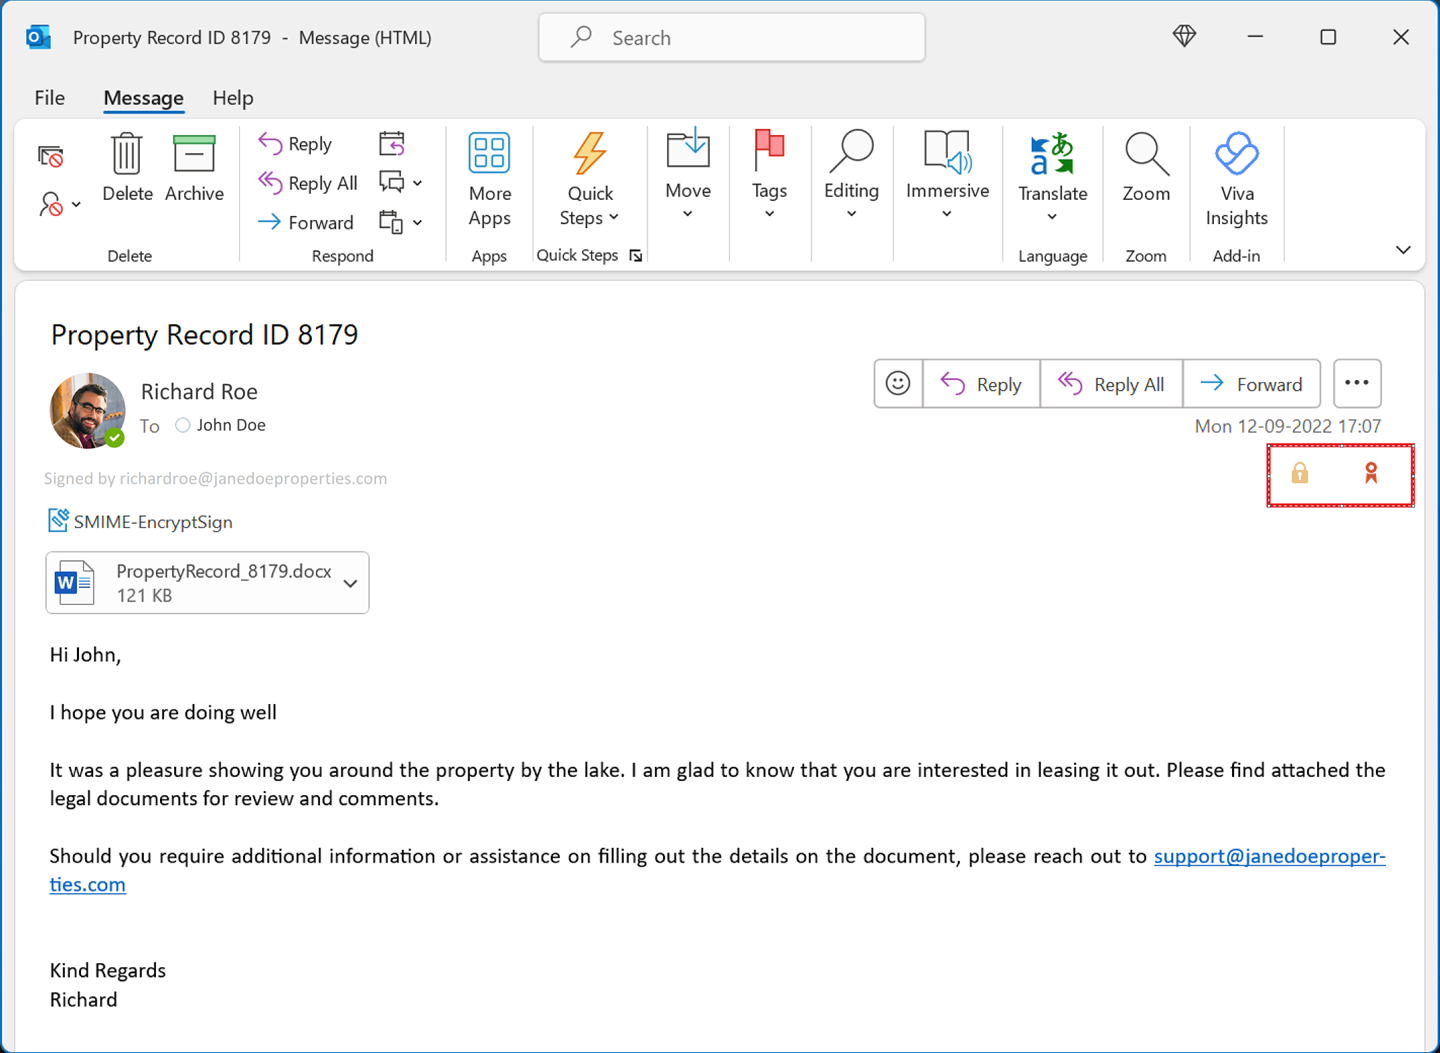
- Your message recipient will see a lock pad and/or a certificate icon at the top right of your email whenever you apply one of the labels.
Known Issues
For admins:
- Watermarking as content marking is not supported for S/MIME labels.
- When admins use sensitivity labels in their organization, they get an option to have header/footer or watermarking on the email that goes out. When S/MIME also comes as a label option, the header/footer content marking works but not the watermarks. Learn more about what sensitivity labels can do here.
- Configuring visual markings per Office application type by using a ${If.App.WXO} variable statement in the text string is not currently available.
For users:
- Sender may see multiple content marks multiple times if they send, recall, and resend a message.
Requirements
- A Microsoft 365 E3 or E5 license.
- Pre-existing S/MIME deployment within your organization.
- If you want to send an encrypted email to someone outside your organization, you and your recipient need
Availability
This feature is rolling out to Insiders running Beta Channel Version 2208 (Build 15601.20028) or later of Outlook for Windows.
Don’t have it yet? It’s probably us, not you.
Features are released over some time to ensure things are working smoothly. We highlight features that you may not have because they’re slowly releasing to larger numbers of Insiders. Sometimes we remove elements to further improve them based on your feedback. Though this is rare, we also reserve the option to pull a feature entirely out of the product, even if you, as an Insider, have had the opportunity to try it.
Feedback
If you have any feedback or additional suggestions for improvements, please click Help > Feedback to let us know.
Learn what other information you should include in your feedback to ensure it’s actionable and reaches the right people. We’re excited to hear from you!